Description
Technical data
Registration
Firmware update
Installation
Description
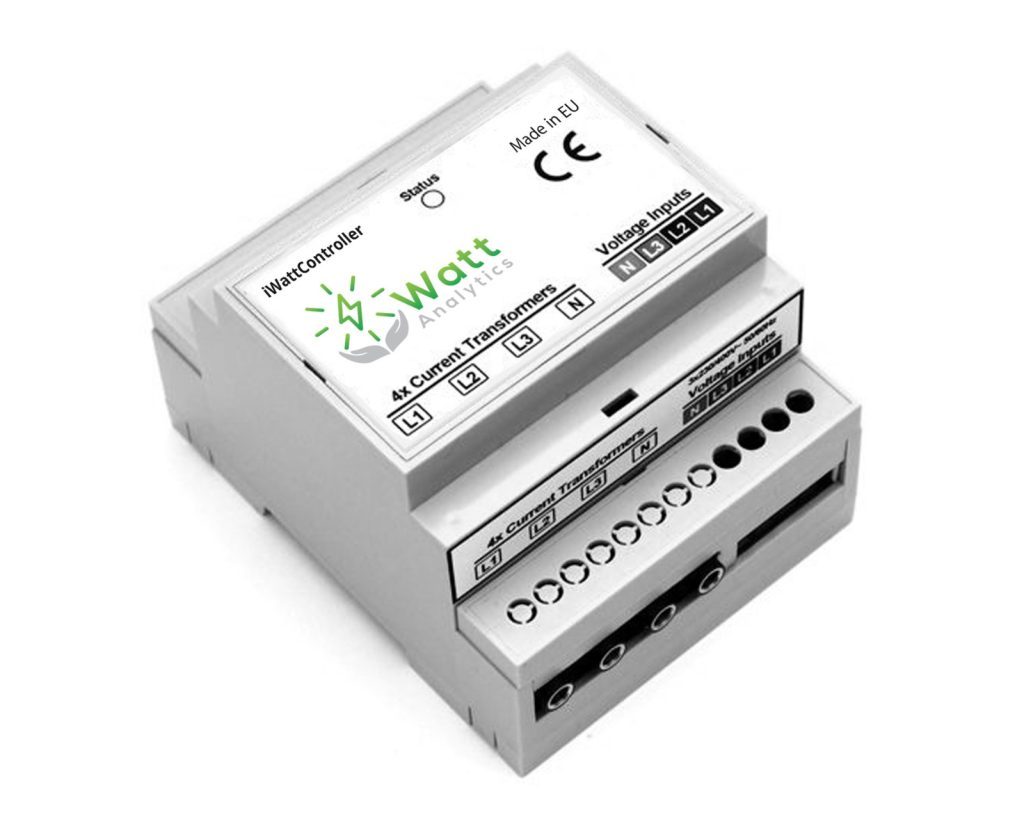
Do you use a PV system to produce your own electricity? Do you consume night-time electricity for your electric heating or your hot water boiler? The iWattController is the ideal meter for private households and businesses that want to produce their own electricity, e.g. via a PV system, and want to both control and optimally use the electricity they produce themselves. The iWattController is equipped with integrated software that records both total electricity consumption and electricity generation. The iWattController is delivered including all necessary current transformers and connection cables. Learn more about the installation of the iWattController here:
Technical data
- Supports 50 Hz or 60 Hz networks with current measurements up to 100 A and voltage measurements from 110 V to 400 V.
- Supports EN 50470-1, EN 50470-3, IEC 62053-21, IEC 62053-22 and IEC 62053-23 standards.
- Compatible with 3-phase, 3- or 4- wire meters (Delta or Wye) and other 3-phase services.
- Provides total (fundamental and harmonic) active, reactive and apparent power as well as fundamental active/reactive energy in each phase and in the entire system.
- Captures highly accurate real-time characteristics with 1% error (typical) in active and reactive energy over a dynamic range of 3000 to 1 at TA = 25 °C.
- Sends the measured properties at least 4 times per second via the MQTT protocol.
- Can be installed on DIN rail.
Registration
- Select “Add new Watt Meter” from the menu in the Watt Analytics app* Make sure your mobile phone is connected to wifi and mobile data is turned off.
- Press “Get Started”
- Connect your mobile phone to the SmartPi-Webgui Wifi Hotspot. Use the password “ChangeMe”.
- In the Watt Analytics App press the button “Connect to Wifi”.
- Login to the RaspAP with user name: “pi” and password: “smart4pi”.
- Select “Dashboard” from the RaspAP Menu
- Press the button “Start wlan0”
- Scroll down to the wifi you want to use for the SmartPi.
- Enter your password in the field “Passphrase” and press the button “Add” *This may take up to a minute. Wait until your browser page refreshes.
- Go back to the Watt Analytis Mobile App and press the “Connect” button and follow the instructions.
Firmware update
On the Watt Analytics Web App, navigate to the Administration -> Site Configuration section. There you will find 3 update buttons “Update WA-PI”, “Update Meter Support” and “Update Evcc”. The system will provide you with feedback if the update was successful
Installation
You can install the firmware for iWattController in the following steps:
1. Switch off the power supply of iWattController.
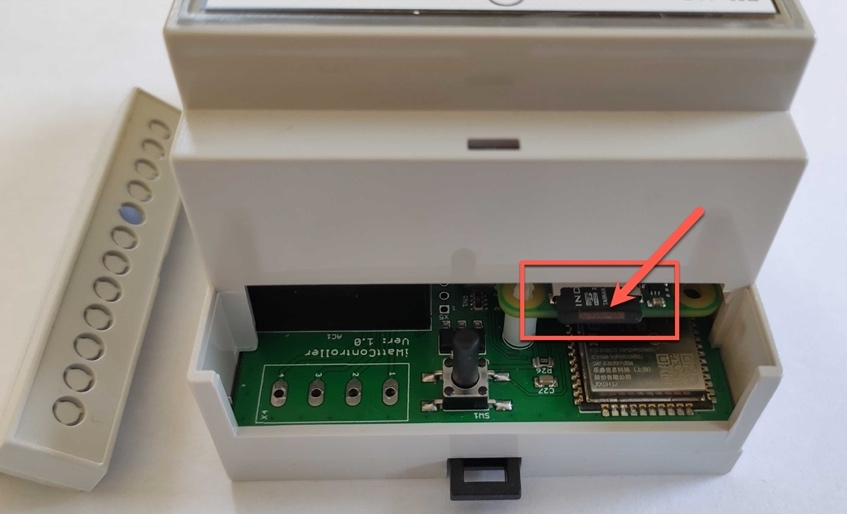
2. Carefully open iWattController back-lid
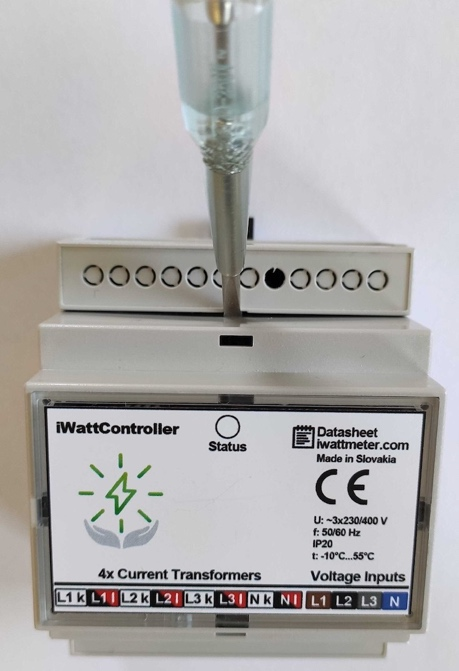
3. Remove SD card from iWattController
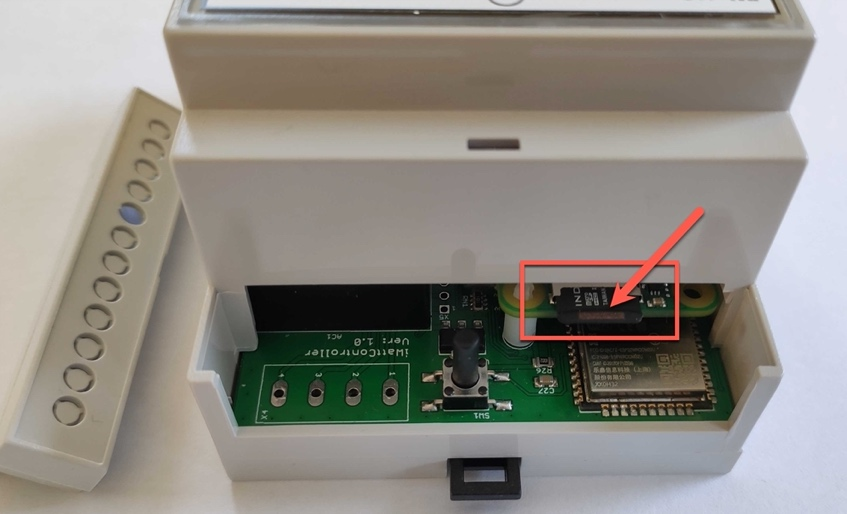
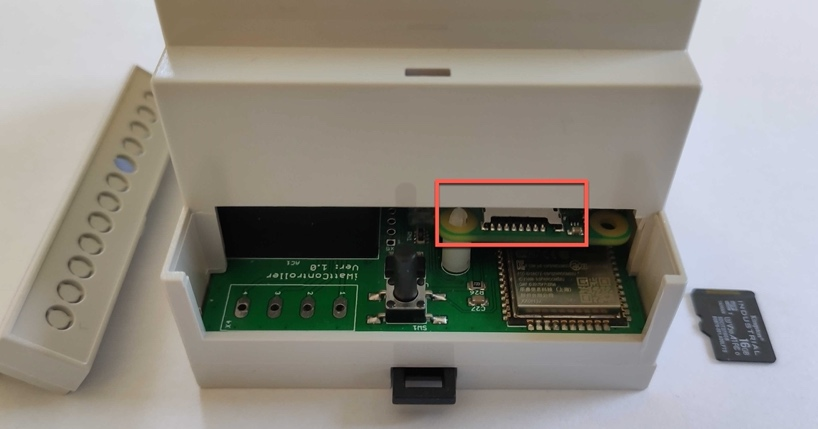
4. Set up SD card for iWattController:
ATTENTION: all data on the iWattController will be deleted! Please back them up in advance if necessary.
Download the latest version of the iWattController image from the link below (~1 GB):ck them up in advance if necessary:
https://files.watt-analytics.com/fw/iwattcontroller-3.2.4-raspi.img.xz
When the download is complete, use the tool “balena Etcher” (https://www.balena.io/etcher/) to copy the image to the SD card. It is necessary to use an SD card with at least 16 GB. 5. Insert the SD card into the iWattController.
5. Insert the SD card into the iWattController.
SmartPI
Description
Technical data
Registration
Firmware update
Installation
Description
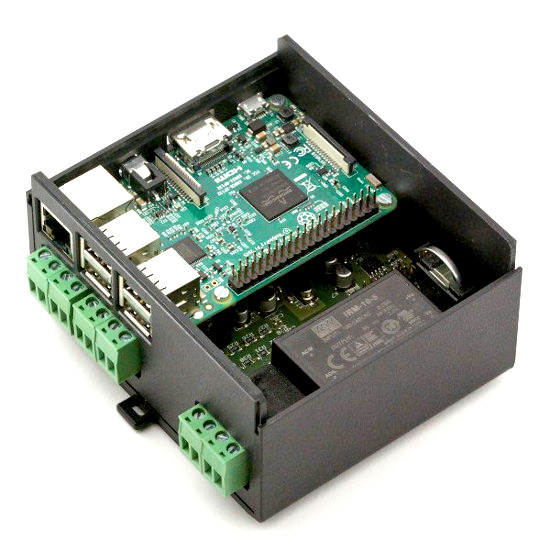
Is a PV system already installed to produce your own electricity? Is night-time electricity used for electric heating or the water boiler? The SmartPI is the optimal measuring instrument for households and businesses that produce their own electricity, e.g. via a PV system, and want to optimally use and control the self-produced electricity.
The SmartPI has integrated software that records total electricity consumption as well as electricity generation.
The SmartPI is supplied including all necessary magnetic contacts and connection cables.
Here you can find all the information on installing the SmartPI.
Technical data
Raspberry Pi compatible connector, Raspberry Pi compatible size.
Galvanic isolation
Integrated power supply from the voltage measurement path via stable terminals (either 2A or 2.5A DC current)
Opensource driver and API
Current measurement on 3 phase + neutral
Connection for cable conversion transformer with secondary output 1A/50mA
Screw terminals for connection of current and voltage measurement
Battery-buffered RTC
Integrated RS-485 interface for connecting Modbus devices
Relay for switching, additional status LED
High-quality housing with top hat rail mounting
Registration
- Select “Add new Watt Meter” from the menu in the Watt Analytics app* Make sure your mobile phone is connected to wifi and mobile data is turned off.
- Press “Get Started”
- Connect your mobile phone to the SmartPi-Webgui Wifi Hotspot. Use the password “ChangeMe”.
- In the Watt Analytics App press the button “Connect to Wifi”.
- Login to the RaspAP with user name: “pi” and password: “smart4pi”.
- Select “Dashboard” from the RaspAP Menu
- Press the button “Start wlan0”
- Scroll down to the wifi you want to use for the SmartPi.
- Enter your password in the field “Passphrase” and press the button “Add”* This may take up to a minute. Wait until your browser page refreshes.
- Go back to the Watt Analytis Mobile App and press the “Connect” button and follow the instructions.
Firmware update
Update firmware wa-pi.jar:
First you have to download the Watt Analytics firmware via the following link (~17 MB): https://files.watt-analytics.com/wa-pi.jar
When the download is finished, transfer the file to the SmartPi e.g. with FileZilla or WinSCP. Use the user pi and transfer the file to the directory /home/pi.
Then you can activate the firmware. Connect to the SmartPi with “ssh pi@IP- your-SmartPi”. Then enter the following command
- sudo mv wa-pi.jar /usr/local/bin/wa- pi.jar
- sudo systemctl restart wa-pi.service
- journalctl -f -u wa-pi.service
In the terminal you should now see the following.
- Started wa-pi Java Service
- WaPiApplication – Version: x.y.z (as described in the mail)
- … INFO and WARN messages but no ERROR messages
Installation
Prepare the SD card for the SmartPi:
ATTENTION: all data on the SmartPi will be lost, please back it up beforehand if necessary.
First you need to download the Watt Analytics SmartPi image via the following link (~4 GB): https://files.watt-analytics.com/wa-pi.dmg.zip
When the download is finished, unpack the zip file on your hard disk.
Then you can transfer the image to the SD card (minimum size: 16GB):
You can now insert the SD card into the SmartPi.
iWattMeter
Description
Installation
Firmware Update
Technical data
Description
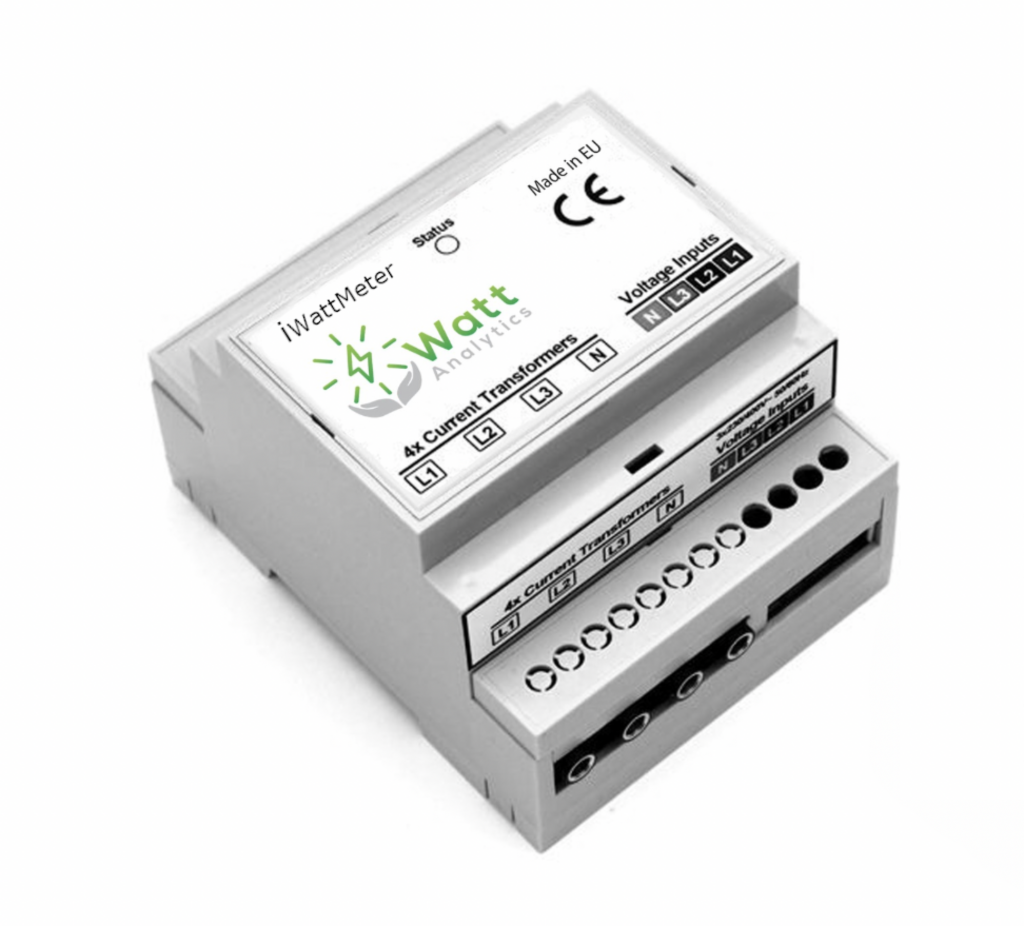
The iWatt Meter provides accurate measurements of electricity consumption at a very attractive price. It can be used in any household or business and ensures a quick payback on the purchase price.
The iWattMeter is a smart electricity meter that measures your current electricity consumption in kilowatt hours (kWh). This gives you your total electricity consumption in real time and to the second.
The iWatt Meter comes with all the necessary magnetic contacts and connection cables.
Download the installation instructions and the EC declaration of conformity.
Detailed power consumption data available at any time
The software displays the following data:
- All active and inactive devices registered in the software.
- Total electricity consumption in KWh and Euro in the selected time period
- Measurement data per unit such as energy consumption in watts and euros, number of times the unit was switched on with date and time, detection rate
- Selection of the displayed period by means of the zoom function
- Display of measurement data in real time
- Detection rate of all electricity consumers in the household or company
Installation
This is how the installation of the Watt Analytics software works:
- download the Watt Analytics app for Android or iOS
- register your account in the login area of the Watt Analytics webpage or in the Watt Analytics app
- start the Watt Analytics app
- simply follow the instructions in the app
Download the installation instructions and the EC declaration of conformity.
Firmware Update
iWattMeter firmware:
- Download the latest version of the iWattMeter firmware via this link (~1.3 MB): https://files.watt-analytics.com/iwattmeter_v2.1.35.bin
- Find out the local IP address of your iWattMeter based on all addresses in your WLAN router or use the Advanced IP Scanner application. Connect your computer to the same WLAN as the iWattMeter. You can find out the iWattMeter IP address based on the MAC address which has the same 6 characters at the end as the iWattMeter’s device ID (printed on the iWattMeter). If a name is displayed, search for ‘Espressif Inc.
- Open the OTA upload form in the browser: “http://iwattmeter- ip/ota/upload”. Example: if the IP address of the iWattMeter is 192.168.1.10, then the upload link is: http://192.168.1.10/ota/upload
- You will see a page similar to this:

- Click on the “Choose File” button and then on the “Update” button.
- Watch the upload process in the lower left corner of the browser.
- When the update is complete, the browser will display the following message: {“id”:0, “message”: “ok”}. If an error message is displayed, switch the iWattMeter OFF and then ON again, wait until it is connected to the WLAN again (approx. 30 seconds) and repeat the OTA upload.
- If the upload was successful, switch the iWattMeter OFF and ON again.
Technical data
Supports 50 Hz or 60 Hz mains with current measurement up to 100A and voltage measurement from 110V to 400V.
Supports EN 50470-1, EN 50470-3, IEC 62053-21, IEC 62053-22 and IEC 62053-23 standards.
Compatible with 3-phase, 3- or 4-wire meters (Delta or Wye) and other 3-phase services.
Delivers total (fundamental and harmonic) active, reactive and apparent power as well as fundamental active/reactive energy in each phase and in the total system. Detects phase sequence.
Real-time characteristics with typically 1% error in active and reactive energy over a dynamic range of 3000 to 1 at TA = 25 ° C.
Transmits at least 4 times per second using the MQTT protocol.
Can be mounted on DIN rail.
